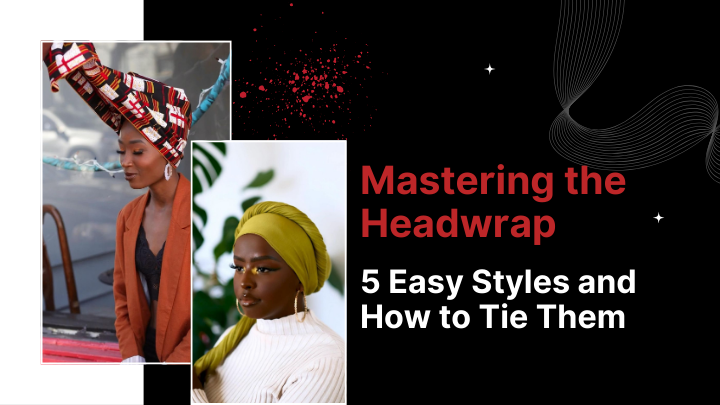
Mastering the Headwrap
Headwraps are an essential part of African fashion, culture, and history. Not only do they protect the hair, but they also serve as a powerful symbol of beauty, pride, and tradition. From everyday wear to special occasions, headwraps can elevate any outfit. Whether you’re new to headwraps or looking to perfect your skills, here are five popular headwrap styles and step-by-step tutorials to help you master the art of tying them.
1. The Classic Tied Headwrap (Turban Style)
This is one of the most versatile and easiest headwrap styles. It’s perfect for both casual and formal occasions and works well with any outfit, from dresses to jeans.
How to Tie:
- Start with a long rectangular piece of fabric: The longer the fabric, the more volume you can create.
- Place the fabric on your head: Fold the fabric in half (lengthwise) so it’s not too thick. Position it on your head with the middle of the fabric at the back of your neck.
- Cross the ends: Bring the two ends of the fabric to the front of your head, crossing them over each other.
- Twist and wrap: Twist the fabric tightly and bring both ends to the back of your head, then tuck them underneath.
- Adjust the front: Bring the fabric from the front up over your forehead and adjust for a neat finish. Tuck in any loose ends.
- Final Touch: Secure the wrap at the back with a pin if necessary, and adjust the front to achieve a smooth, polished look.
This style can be styled higher or lower on the forehead, depending on your preference!
2. The Bow Tie Headwrap
The bow tie headwrap is fun and playful, adding a cute touch to your outfit. It’s especially great for special occasions like weddings, parties, or casual outings.
How to Tie:
- Choose a rectangular fabric: A medium-sized piece of fabric works best for this look.
- Place the fabric over your head: Position the fabric at the nape of your neck, with the two ends even on both sides.
- Tie a knot at the front: Bring the ends of the fabric to the front and tie them into a knot in the middle of your forehead, ensuring the fabric is pulled tight.
- Form the bow: Take the ends of the fabric that are now in front, fold them into loops, and tie them together, forming a bow.
- Tuck in the loose ends: Secure any loose ends behind the bow and adjust the bow to your desired size and position.
- Perfect the shape: Fluff up the bow, ensuring it’s balanced and neatly positioned.
This style works particularly well with vibrant fabrics and is a fun way to add a pop of color to your look.
3. The Simple Knot Headwrap
The simple knot headwrap is understated but still chic. It’s perfect for quick styling, and it’s easy enough to wear every day. This style is also great for adding some elegance without too much fuss.
How to Tie:
- Select a rectangular fabric: The length of the fabric can vary depending on the size of the knot you want to create.
- Place the fabric on your head: Position the fabric so that it sits comfortably on the crown of your head, with the ends hanging down evenly at both sides.
- Tie a knot at the front: Bring the two ends of the fabric to the front and tie them into a simple knot, adjusting the position of the knot to your liking.
- Tuck and secure: Tuck any loose ends behind the knot at the back of your head to keep it neat.
- Adjust the fit: Slightly pull the fabric on the sides to create a smoother, more defined look.
This style works well with any outfit and is especially perfect for relaxed, casual days or even a day at the office.
4. The Side Knot Headwrap
The side knot headwrap is a stylish and trendy look that adds a bit of drama to your outfit. This style is perfect for people who want to make a bold statement and is great for parties, festivals, or casual chic looks.
How to Tie:
- Pick a long rectangular piece of fabric: The length should be long enough to tie a knot to the side.
- Place the fabric over your head: Position the fabric so that it covers your hair and falls evenly down both sides of your head.
- Bring the ends to one side: Gather both ends of the fabric and pull them to one side of your head (left or right, depending on your preference).
- Tie a knot on the side: Secure the fabric by tying a loose knot on the side of your head, just above your ear.
- Tuck in any loose ends: Neatly tuck in any fabric that is hanging out of the knot, and adjust to ensure the fabric is tight and secure.
This side knot adds a playful and bold touch and is perfect for casual outings, festivals, and special events.
5. The Wrapped and Twisted Headwrap
This style combines the elegance of a wrap with a twist, literally. It’s a popular style that adds a bit of texture and volume, and it’s perfect for both formal events and stylish everyday wear.
How to Tie:
- Choose a long, wide fabric: The wider the fabric, the more dramatic the twists can be.
- Place the fabric on your head: Position the fabric across the back of your head, with the fabric ends resting evenly on both sides of your face.
- Twist the fabric: Take one side of the fabric and begin twisting it tightly toward the back of your head. Repeat with the other side, ensuring that both twists are even and firm.
- Bring the twists together: Cross both twisted sections of fabric at the back of your head, bringing them to the front.
- Tie and adjust: Tie the twisted fabric into a knot at the front of your forehead, then tuck in the loose ends and adjust the twists for a neat, smooth look.
This look exudes sophistication and style, making it perfect for formal events or whenever you want to stand out.
Final Tips for Headwrap Mastery
- Fabric choice matters: Different fabrics give different looks, so experiment with different materials like cotton, silk, or African prints for varied textures and effects.
- Adjust for comfort: Ensure the wrap feels secure but not too tight to avoid discomfort, especially if wearing it for extended periods.
- Play with colors and patterns: Don’t be afraid to experiment with bold colors and vibrant patterns. Headwraps are a great way to add flair to any outfit.
- Practice makes perfect: It may take a few tries to perfect each style, so don’t worry if you don’t get it right the first time. Keep experimenting, and soon you’ll be a pro at headwrap tying.
Mastering the headwrap is not just about learning to tie fabric—it’s about embracing a cultural tradition and expressing your personal style. Whether you’re going for a classic look, a fun bow tie, or a sophisticated twisted style, these five easy headwraps will help you look fabulous for any occasion. So grab your favorite fabric, start experimenting, and let your headwrap reflect your beauty, creativity, and heritage!

- Centenary Square, Nambour, Sunshine Coast
- + 61 (754) 059543
- support@africanstores.com.au
Product Summary